

Introduction :
Migration is one of the important features of Laravel which can also be called table. Migrations are created with the command. Migrations in Laravel are used to store data. Migration makes it easy to handle data, rollback tables, re-delete and update columns. A migration works according to their structure. There are two methods of emigration, up and down, which have their own functions. The up method creates the migration and the down method rolls it back.
Top Features :
1. Creating with a Single Command or Model Command :
2. Rollback
3. Working with the Up and Down Methods
4. Add more columns to existing migration without rollback
5. Refresh migrations
6. Different types of DataTypes
1. Creating with a Single Command or Model Command :
Migration is created with the model command and a single migration command. Both model and migration are created with model command and in the last of this command -m is used to create migration and migration is created with plural of model name. With signal migration command only migration is created in which migration is created with a name. For example look the commands below :
php artisan make:model ModelName -m
php artisan make:migration migrationName
After running the command in terminal the migration is created like code below :
<?php

use Illuminate\Database\Migrations\Migration;

use Illuminate\Database\Schema\Blueprint;

use Illuminate\Support\Facades\Schema;

class CreateStudentFormsTable extends Migration

{

    /**

     * Run the migrations.

     *

     * @return void

     */

    public function up()

    {

        Schema::create('student_forms', function (Blueprint $table) {

            $table->id();

            $table->timestamps();

        });

    }

    /**

     * Reverse the migrations.

     *

     * @return void

     */

    public function down()

    {

        Schema::dropIfExists('student_forms');

    }

}
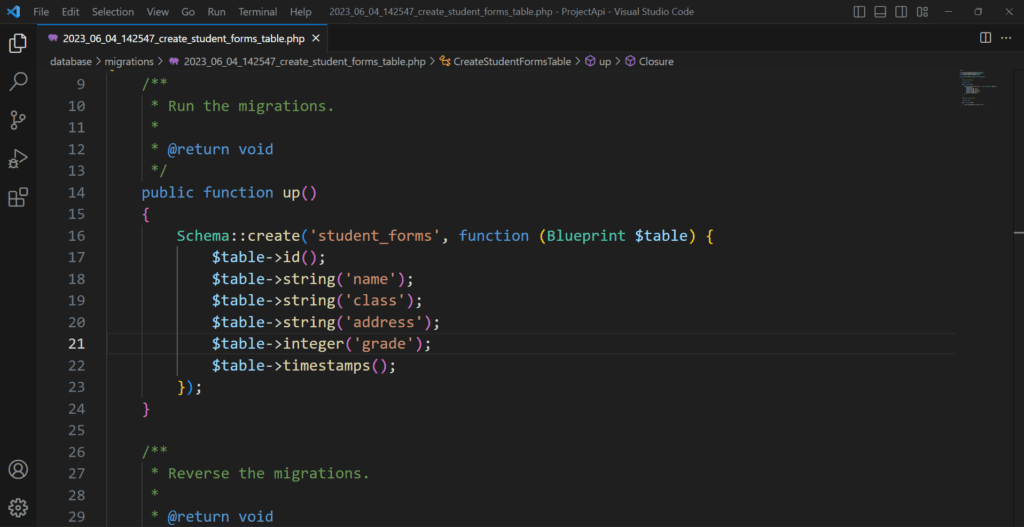
After the migration is created, all the required columns are added to the migration. In migration the columns are added with specific datatype like string will be used for name column and integer datatype will be taken for number,
For example see image below :
After adding the column to the migration, the migration is migrated with the command that creates the migration in the database, after which that migration is used to store the data. Look command below :
php artisan migrate
2. Rollback
Rollback is an important feature and command of migration. It is used after a migration is migrated, before that the ROLLBACK command is needed. Look command below :
php artisan migrate:rollback
Rollback in migration means to back the migrations again and make changes in it. Changes like :
-Data type changes
-Column name change
-Remove column
-Add new column
-Add foreign keys
For example, many times it happens that in first migration the given column name has to be changed to something else, then in direct migration it is not changed, for this first migration rollback command is used and then the column name is changed.
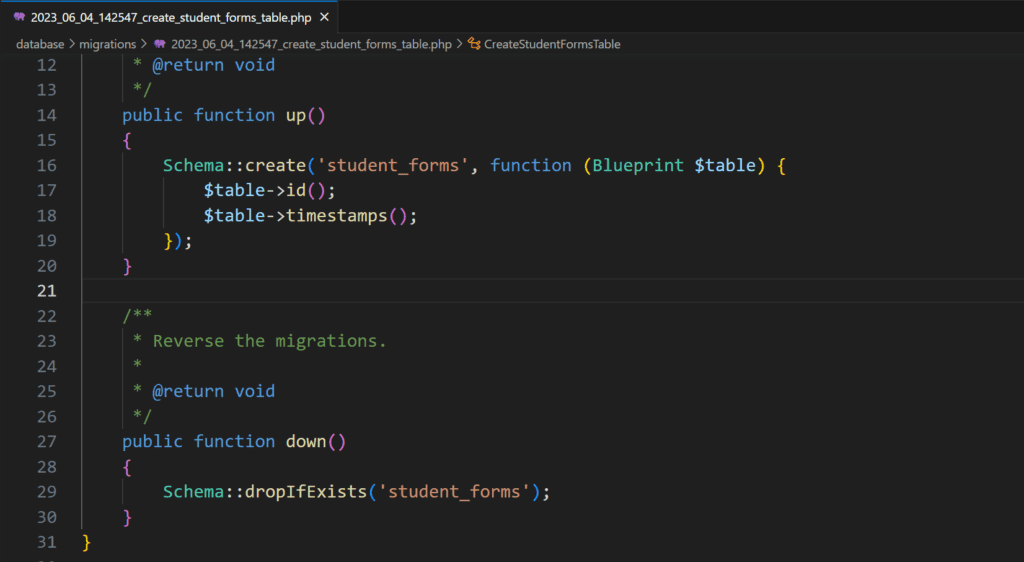
3. Working with the Up and Down Methods :
Migration works in two ways. The up method creates the migration and the down method rolls back the migration. Both these methods are important in migration.
Whenever a migration is created, both these methods are created in it.
For example see the image below :
4. Add more columns to existing migration without rollback :
Rollback command rolls back all migrations in that batch and cleans up the data inside them, but sometimes the data is critical and cannot be rolled back. So for that new migration is created and column is added
for example see command and migration code below
:
php artisan make:migration add_new_column_in_users –table users
<?php

use Illuminate\Database\Migrations\Migration;

use Illuminate\Database\Schema\Blueprint;

use Illuminate\Support\Facades\Schema;

class AddNewCoulmnInUsers extends Migration

{

    /**

     * Run the migrations.

     *

     * @return void

     */

    public function up()

    {

        Schema::table('users', function (Blueprint $table) {

            //

        });

    }

    /**

     * Reverse the migrations.

     *

     * @return void

     */

    public function down()

    {

        Schema::table('users', function (Blueprint $table) {

            //

        });

    }

}
You can add columns after creating the migration and after migrating those columns are added to the existing table.
Columns are added in the up method and also in the down method.
For example look code below :
public function up()

    {

        Schema::table('users', function (Blueprint $table) {

            $table->bigInteger('phone_number');

            $table->text('address');

        });

    }

    /**

     * Reverse the migrations.

     *

     * @return void

     */

    public function down()

    {

        Schema::table('users', function (Blueprint $table) {

            $table->dropColumn([

                'phone_number',

                'address'

            ]);

        });

    }
5. Refresh migrations
Migrations can also be refreshed. If you want to clear the data of all the tables, then you have to clear the data of each table, but with the refresh command, we can clear all the tables at once.
Look command below :
php artisan migrate:refresh
6. Different types of DataTypes :
There are different types of datatypes in migration, the datatype of each column can be derived according to its type. For example look code below :
public function up()

    {

        Schema::table('users', function (Blueprint $table) {

            $table->bigInteger('phone_number');

            $table->text('address');

            $table->date('date');

            $table->time('start_time');

        });

    }