
This article is about how to send mail in laravel.
Create Mailable class and Whatever data has to be sent to the receiver and the type of view that has to be sent is return in the Mailable class.
Table of content :-
#Configure Your Sender Email Credentials in .env file
#Step 2: Create Mailables Class
#Step 3: Create Mail View
#Step 4: Create Controller
#Step 5: Create Routes
Send Email :-
Receive Email :-

#Step 1: Configure Your Sender Email Credentials:-
Email SMTP configuration is done in the variables of the env file.
The Simple Mail Transfer Protocol (SMTP) is an application used by mail servers to send, receive, and relay outgoing email between senders and receivers. As the technology behind email communication, SMTP is the protocol that allows you to send and receive emails.
For Example :-
MAIL_MAILER=smtp

MAIL_HOST=smtp.mailtrap.io

MAIL_PORT=2525

MAIL_USERNAME=926b9ce670****

MAIL_PASSWORD=b67f546fc*****

MAIL_ENCRYPTION=tls

MAIL_FROM_ADDRESS=user@yopmail.com

MAIL_FROM_NAME="${APP_NAME}"
#Step 2: Create Mailables Class
Whenever it comes to sending mail in Laravel, the “Mailable” class is used for that. The mailable class is created with a single command. For example see the command below
php artisan make:mail MailNameapp\Mail\TestMail.php
<?php

namespace App\Mail;

use Illuminate\Bus\Queueable;

use Illuminate\Contracts\Queue\ShouldQueue;

use Illuminate\Mail\Mailable;

use Illuminate\Queue\SerializesModels;

class TestMail extends Mailable

{

    use Queueable, SerializesModels;

    public $user;

    /**

     * Create a new message instance.

     *

     * @return void

     */

    public function __construct($user)

    {

        $this->user = $user;

    }

    /**

     * Build the message.

     *

     * @return $this

     */

    public function build()

    {

        return $this->view('users.test-email');

    }

}
#Step 3: Create Mail View
A view of the mail has to be created in which whatever data is to be displayed in the mail is entered. This view can be designed in any way. Data can be sent to the receiver according to any view.
resources\views\users\test-email.blade.php
<!DOCTYPE html>

<html lang="en">

<head>

    <meta charset="UTF-8">

    <meta http-equiv="X-UA-Compatible" content="IE=edge">

    <meta name="viewport" content="width=device-width, initial-scale=1.0">

    <title> Verification Email</title>

</head>

<body>

    <h1>This Verification Email Is Sent From easywebprogramming.com</h1>

</body>

</html>
#Step 4: Create Controller
php artisan make:controller TestEmailControllerapp\Http\Controllers\TestEmailController.php
<?php

namespace App\Http\Controllers;

use App\Mail\TestMail;

use App\Models\User;

use Illuminate\Http\Request;

use Illuminate\Support\Facades\Mail;

use Illuminate\Validation\Validator;

class TestEmailController extends Controller

{

    public function register()

    {

        return view('users.register');

    }

    public function store(Request $request)

    {

        $request->validate([

            'name'     => 'required',

            'email'    => 'required',

            'password' => 'required'

        ]);

        $user = User::create([

            'name'     => $request->name,

            'email'    => $request->email,

            'password' => $request->password

        ]);

        Mail::to($request->email)->send(new TestMail($user));

        return redirect()->route('users.register')->with(

            'success',

            'Test mail sent to your email address.'

        );

    }

    public function testEmail()

    {

        return view('users.test-email');

    }

}
#Step 5: Create Routes
routes\web.php
Route::get('/home', 'HomeController@index')->name('home');

Route::group(['prefix' => 'users', 'as' => 'users.'], function() {

    Route::get('register', 'TestEmailController@register')->name('register');

    Route::post('/store', 'TestEmailController@store')->name('store');

    Route::get('/test-email', 'TestEmailController@testEmail')->name('test-email');

});
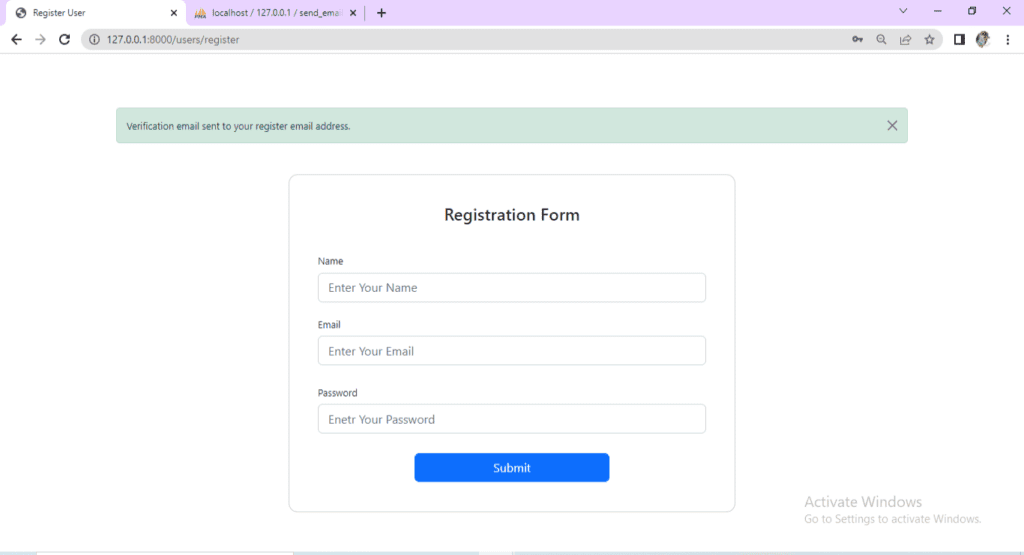
Step 6: Create Form View
register.blade.php
    <section class="vh-100 gradient-custom">

        <div class="container py-5 h-100">

            <div class="row justify-content-center align-items-center h-100">

                @if( session('success'))

                <div class="alert alert-success alert-dismissible fade show mt-4" role="alert">

                    {{ session('success') }}

                    <button type="button" class="btn-close" data-bs-dismiss="alert" aria-label="Close">

                    </button>

                </div>

                @endif

                <div class="col-12 col-lg-9 col-xl-7">

                    <div class="card shadow-2-strong card-registration" style="border-radius: 15px;">

                        <div class="card-body p-4 p-md-5">

                            <h3 class="mb-4 pb-2 pb-md-0 mb-md-5 text-center">Registration Form</h3>

                            <form action="{{ route('users.store') }}" method="post">

                                @csrf

                                <div class="row">

                                    <div class="col-md-12 mb-4">

                                        <div class="form-outline">

                                            <label class="form-label" for="firstName">Name</label>

                                            <input type="text" name="name" id="name" class="form-control form-control-lg" placeholder="Enter Your Name">

                                        </div>

                                    </div>

                                </div>

                                <div class="row">

                                    <div class="col-md-12 mb-4 pb-2">

                                        <div class="form-outline">

                                            <label class="form-label" for="emailAddress">Email</label>

                                            <input type="text" name="email" id="emailAddress" class="form-control form-control-lg" placeholder="Enter Your Email">

                                        </div>

                                    </div>

                                    <div class="col-md-12 mb-4 pb-2">

                                        <div class="form-outline">

                                            <label class="form-label" for="phoneNumber">Password</label>

                                            <input type="password" name="password" id="password" class="form-control form-control-lg" placeholder="Enetr Your Password">

                                        </div>

                                    </div>

                                </div>

                                <div class="d-grid gap-2 col-6 mx-auto">

                                    <input class="btn btn-primary btn-lg" type="submit" value="Submit" />

                                </div>

                            </form>

                        </div>

                    </div>

                </div>

            </div>

        </div>

    </section>
Email Receive Output :-